
ADVERTISEMENT
Step 2: Wash and Dry Thoroughly
Scrub each potato under cold running water. Use a vegetable brush to remove dirt from the skin. The skin is about to become delicious—you want it clean.
Crucial step: Dry the potatoes completely with a clean kitchen towel or paper towels. Any moisture left on the skin will turn to steam and prevent crisping.
Step 3: Pierce the Skin (Don’t Skip This!)
Use a fork to pierce each potato 6-8 times, all over. Poke deep enough to penetrate the skin. This allows steam to escape during baking.
ADVERTISEMENT
Why this matters: Without vent holes, steam builds up inside. The potato can explode in your oven. It’s rare, but it happens. Also, piercing allows moisture to escape, which helps the interior become fluffy instead of dense.
Step 4: Season the Skin (This Is the Secret)
Place the dried, pierced potatoes in a large bowl. Drizzle with 1 tablespoon of neutral oil per potato (avocado oil, vegetable oil, or melted butter). Toss to coat evenly.
Sprinkle generously with coarse kosher salt (not fine table salt) and freshly ground black pepper.
Optional seasonings: garlic powder, onion powder, paprika, or dried rosemary.
Why oil? Oil conducts heat, crisps the skin, and helps the seasoning stick. Skip the oil and you’ll get dry, leathery skin.
Why coarse salt? Fine salt dissolves and penetrates. Coarse salt sits on the surface, creating tiny crunchy crystals. The contrast between crispy salted skin and fluffy interior is what makes a perfect baked potato.
Step 5: Bake Directly on the Oven Rack (No Foil!)
Place the seasoned potatoes directly on the middle oven rack. Put a baking sheet on the rack below to catch any drips (sometimes oil or moisture escapes).
Do not wrap in foil. I’ll say it again: do not wrap in foil. Foil traps steam. Steam makes the skin soft and chewy. We want crispy.
Step 6: Bake for 60-75 Minutes
Bake at 400°F for 60 minutes for medium potatoes (about 8-10 oz each). For larger potatoes (12-14 oz), bake for 75 minutes.
Do not open the oven door during the first 45 minutes. Every time you open the door, heat escapes and temperature drops. Be patient.
Step 7: Check for Doneness
At 60 minutes, remove one potato (carefully—it’s hot). Test by:
Squeeze test (use an oven mitt): Give the potato a gentle squeeze. It should give easily and feel soft all over.
Fork test: Insert a fork or skewer into the center. It should slide in with no resistance, like room-temperature butter.
Internal temperature: Should be 205-210°F (use an instant-read thermometer).
If the potato is still firm, return to the oven and check every 10 minutes.
Step 8: Remove and Slit Immediately
Remove the potatoes from the oven. Using a sharp knife, immediately cut a deep “X” or a long slit down the center of each potato.
Why immediately? As the potato cools, the interior continues to cook and then sets. Cutting it open immediately releases steam and stops the cooking process, ensuring a fluffy interior.
Step 9: Fluff the Interior
Hold the potato (with an oven mitt) at both ends. Gently squeeze and push inward. The fluffy interior will push up through the slit, like a blooming flower.
Then take a fork and gently “fluff” the inside by scraping back and forth. This creates pockets for butter and toppings to melt into.
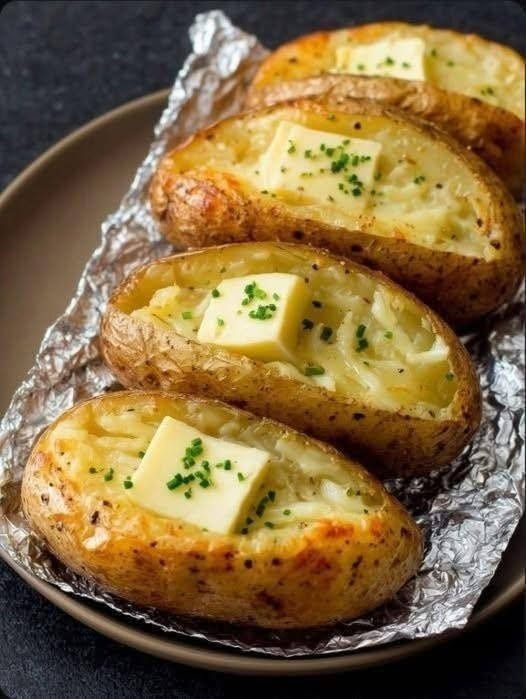
Step 10: Add Toppings and Serve Immediately
Add a generous pat of butter (it will melt into the fluffy crevices). Sprinkle with additional salt if needed. Serve with your favorite toppings (see below).
The Science Behind the Perfect Baked Potato (Quick Explanation)
If you’re curious why this method works, here’s the simple science.
Starch gelatinization: Potatoes contain starch granules. When heated with moisture (the water inside the potato), the starch granules absorb water, swell, and eventually burst, creating that fluffy texture. This happens around 140-160°F.
Pectin breakdown: Pectin is the glue that holds potato cells together. At higher temperatures (180-200°F), pectin breaks down, allowing the cells to separate easily. That’s why a properly baked potato is tender, not gluey.
see continuation on next page
See more on the next page to continue reading →
ADVERTISEMENT